‘Mr Whippy’ Cupcakes
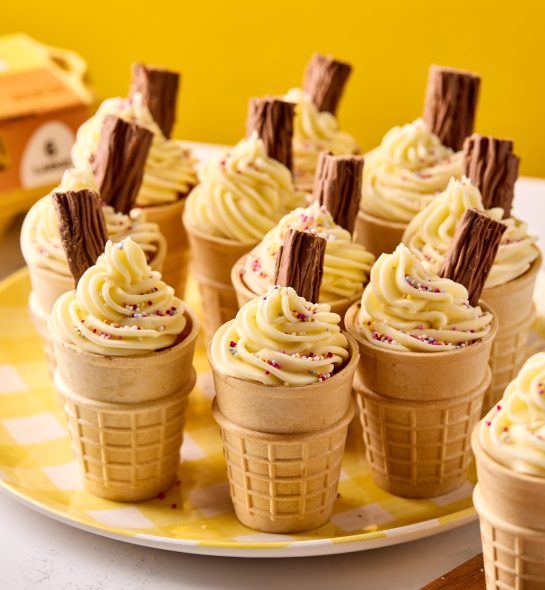
Get ready to scoop up some fun with our 99’ inspired ice cream cone cakes. Baked inside their own edible cones, they're the sweetest seaside treat for your picnic basket or garden party. Perfect for sunny days and smiles all around!
Like at your traditional ice cream van experience, these ice creams can be designed just as you like. Make chocolate buttercream to represent chocolate ice cream, drizzle over strawberry sauce or skip the sprinkles and add two flakes! The toppings are up to you…
Prep: 5 mins | Cook: 15 mins
Serves 12 people
Ingredients
- FOR THE CUPCAKES
- 120g butter, softened
- 120g caster sugar
- 1 teaspoon vanilla paste or essence
- 120g self raising flour
- 1 teaspoon baking powder
- 2 FREE eggs
- 1 tablespoon milk
- 12 flat-bottomed wafer ice cream cones
- FOR THE BUTTERCREAM
- 150g butter, softened
- 300g icing sugar, sifted
- 1 teaspoon vanilla paste or essence
- FOR DECORATION
- 6 chocolate flakes, cut in two
- 2 tablespoons sprinkles
- YOU WILL NEED
- 12 hole muffin tin
- Foil
- Piping bag and star nozzle
Method
- Preheat oven to 200ºC/180ºC fan.
- Cream together the butter, sugar and vanilla in a bowl, by hand or using an electric mixer, until light and fluffy. Measure out the flour and baking powder into a bowl before sifting together.
- Crack 1 egg into the creamed butter and sugar. Add in a tablespoon of flour before whisking together just until combined. Repeat the process with the second egg.
- Add the remaining flour into the bowl along with the milk. Whisk all the ingredients together well to form a smooth, thick cake batter.
- Take the muffin tin and foil over the top, covering the holes. Using a sharp knife, create holes in line with each muffin hole and poke in a cone – the foil is to ensure the cones remain upright in the oven.
- Once you have positioned your 12 cones, equally divide the cake batter between the cones – either carefully spoon in or transfer your batter to an icing bag and pipe in the batter for greater accuracy.
- Carefully transfer the cones to the oven and bake for 12-15 minutes until the cakes are golden, risen and cooked through when tested. Remove from oven and allow to completely cool
- In the meantime, make the buttercream. By hand or using an electric whisk, cream together the butter, icing sugar and vanilla until thick and smooth. Transfer to a piping bag with star nozzle attached.
- When the cakes are completely cooled, pipe a swirl of butter cream on each cone imitating a ‘Mr Whippy’ style 99’ ice cream. Sprinkle over your desired sprinkles and finally add a flake before serving.

